 Make learning letters a little more fun and hands on with some of these ideas! Be sure to make these activities as meaningful as possible by sitting down with children as they are engaged.
For your convenience, we have provided Amazon links to many of the items mentioned in the descriptions.
Buried Treasure Letters – Find some letters at a craft store (wood, foam or plastic) or use something that you already have at home. In an extra large container or plastic tub, pour half to one full bag of play sand. Bury the letters in the sand and then have your little one dig for those “letter treasures”. As he/she pulls out a letter share the name of the letter and the sound that it makes. (Another fun version of this activity for older preschoolers or kindergartners is to find small items that start with the letters of the alphabet and bury those too. Then give he child the task of finding a letter and its matching object.)
Water Paint Letters on Chalkboards – This is an idea that’s better than paint because the clean up is quite a bit easier. Get a few different sizes of paintbrushes, a large cup or bucket of water and a black or green chalkboard. Depending upon the level of the child, you can call out a letter for him/her to “paint” on the board. Within a short period of time the water evaporates and you’re ready for another letter. Another option for beginning letter learners is for the adult to paint the letter on the board and the child traces that letter. Once a child knows the entire alphabet (and if your chalkboard is big enough) a challenge can be to see if the child can write the entire alphabet on the board and finish it before the letter “A” evaporates.
Play-Doh Letters – There are two ways that this can be done. The first is simply having a child form their letters with Play-Doh. (It might be easier if an adult helps to roll out some long thin rolls first.) Another option for Play-Doh is to use a rolling pin and flatten out large “sheets”. Use cookie cutters shaped like letters to cut out and name.
Jello Pudding/Gelatin Letters – Kids LOVE this one because it tastes yummy! Pour out the contents of a box of pudding or gelatin onto a cookie sheet. (No prep needed…just use the dry mix straight from the box.) Call out letters for the child to draw in the mix. To “erase” gently shake the cookie sheet so that the mix spreads back out and have the child lick his/her finger to prepare for a new letter. 🙂
Lego Letters – This one is a hit with boys especially. Call out letters as the child attempts to build three dimensional letters from the blocks OR use a building plate and have them form the letters on the surface.
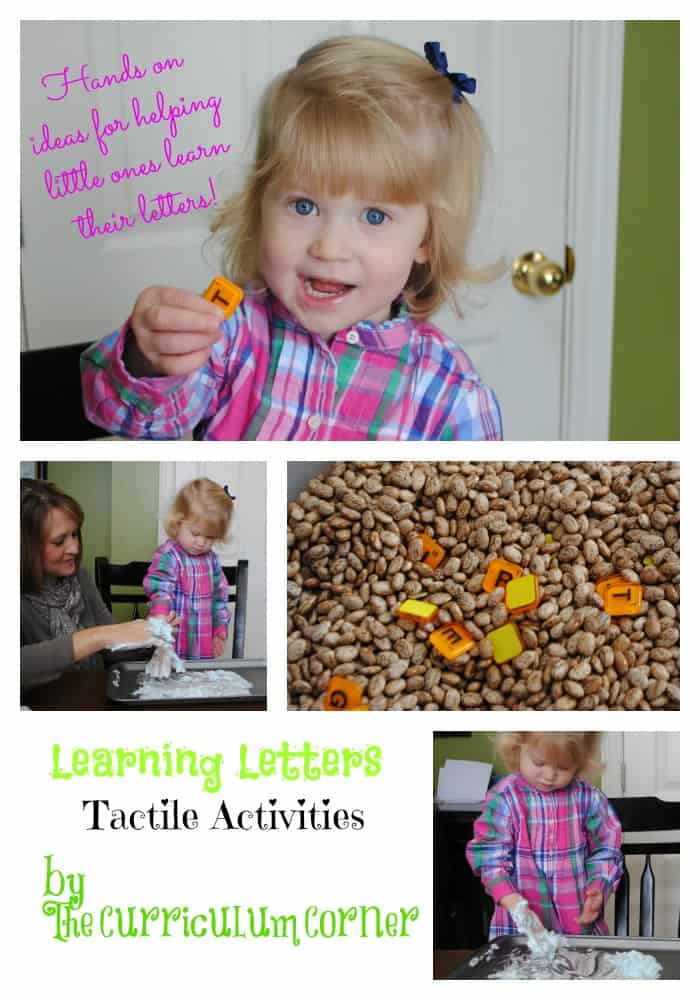
Shaving Cream – Simply spray the shaving or whipped cream onto a large piece of waxed paper taped to the table (or use a cookie sheet). The child uses his/her finger to practice forming letters. **NOTE – Be sure the child is supervised so that the shaving cream doesn’t go into a little mouth! YUCK!
Wiki Stick or Pipe Cleaner Letters – Have the child form letters out of these bendable items. You can keep these in a box for future practice.
Sponge Paint Letters – These can be used with paint or even with the water and chalkboard activity described above. Kids LOVE to spell their names with these. You will need large pieces of drawing paper or even butcher paper to make this more fun.
Newspaper/Magazine Cut Out Letters – This is a good activity for older preschoolers or kindergartners. (I have even used it in my 2nd grade classroom at times.) Set out magazines or newspapers (previewed to make sure there is no questionable content). Be sure there is a lot of large print so that the children can easily cut around the letters. Have the students paste specific letters or their entire alphabet onto a piece of paper. This is a good activity for kids to practice fine motor skills.
Back-to-Back Letters – This activity doesn’t require any materials. Have two children (or an adult and a child) sit one in front of the other (so that one child is facing the other’s back). Give the student in the back a letter to draw on the other child’s back. The child in front needs to guess the letter that is drawn. (We also do this at home to practice spelling words with our youngest children!)
Letter Stamps – Letter stamps can be used in so many ways at home or in classrooms. Students can practice letters, alphabet or practice stamping out their names in different colors.
Biscuit Dough Letters – YUM!!!! For this you need three to four cans of biscuit dough…so that you have a biscuit for each letter of the alphabet. (Obviously this can only work if you have access to an oven.) Divide up the alphabet and assign letters to your kids so that you have every letter represented at the end. (You may want to limit the size of the letters. One way to do this is to give children a pre-cut piece of wax paper on which to form their biscuit letter and tell them the letter has to fit onto the paper.) After all the letters have been formed, simply bake and enjoy! Don’t forget to review each letter before eating them though!
Icing Letters – Another yummy idea is buy plain round sugar cookies and tubes of icing. Have children write the letters they are learning with the icing on the tops of the cookies.
Nicole Dz
Thursday 18th of September 2014
I love these fun ways to teach the alphabet to kids. Make it fun but very educational also. Great to incorperate these at home as well as in the classroom.