Use this writing informational text unit of study to help your students write their own All About Books. Contains mini-lessons, anchor charts & more.

We have created this informational text writing unit of study to help guide your students through the nonfiction writing process.
***You will be able to download the complete, free collection by clicking on the bold, light green words at the bottom of this post.***
For this unit to best serve you and your students, you might want to front load them with knowledge about animals before beginning. Read lots of nonfiction animal books and have them watch real life videos on computers before you begin having them write. Though we have provided some ideas for helping your students learn and record new facts, their writing for this unit will rely quite a bit on what they already know. Videos and class read-alouds can help build the background knowledge needed for these “All About Books”. We have also provided a letter you can sign and send home to parents so they can help too. We suggest you send this home a few weeks before the writing unit so parents have the opportunity to find and read books with their children if they choose.
To begin this unit, compile a large collection of nonfiction/informational text books you can refer to for illustration of ideas and clarification of questions throughout the unit.
**We have provided resources that say “informational text” and also “nonfiction” because we know some districts have very specific language that is required in teaching this type of reading and writing. For uniformity purposes we will use the term “nonfiction” for the remainder of the post.
Noticings – For this lesson grab a few of your nonfiction books to share with the students, but also place five or six of them in another stack mixed in with some fiction books you have already read with your students. First flip through the nonfiction books to talk about the kinds of things they see in the books and how they are different than the other story books they have read. Share the anchor chart we have provided or create your own on the blank anchor chart template.
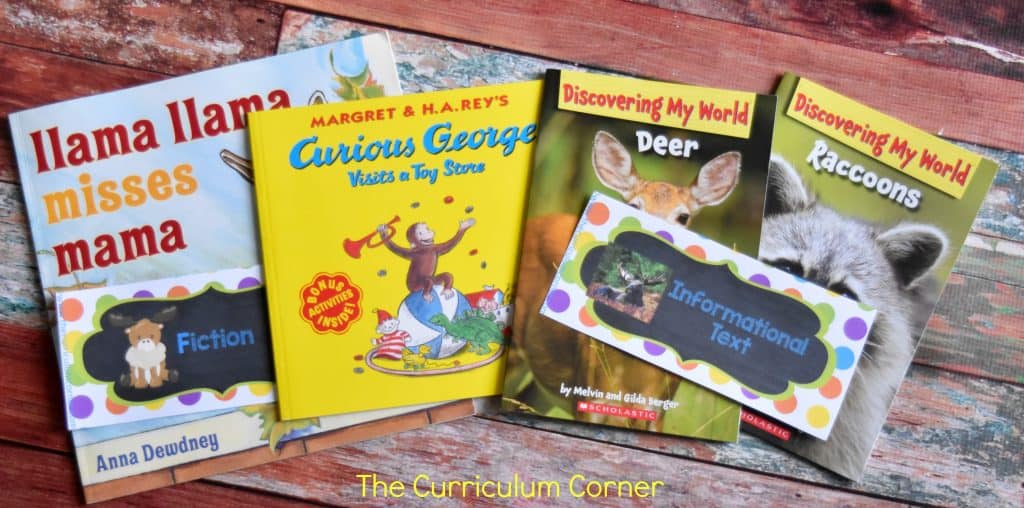
Next, you can do this sorting activity with your students. Place our “Nonfiction” and “Fiction” signs on the floor or on a board. Discuss the difference between the pictures on these two signs and what that means. (One is a photograph of a moose , while the other is an illustration.) Look at the stack of books together one by one, and quickly discuss and determine whether each one is nonfiction or fiction based on what the students see on the cover and as you flip through the pages quickly with them.
To follow up this discussion, either as reteaching or even a center idea, provide students with other stacks of nonfiction and fiction books. Print and laminate the book marks provided. The students’ task will be to sort through the stack to find one nonfiction and one fiction book. They will place the bookmarks in the corresponding books and you can quickly check for understanding. We have also provided pages for students to write the titles of the books they have chosen as fiction and nonfiction for those who are ready for that level. (Bookmarks have been provided in color and in black & white in case you want to send them home with students for additional practice with parents.)

More Comparison of Informational Text to Literature – To start this lesson choose two books – one fiction and one nonfiction – that have a similarity in their topics. For example, you might choose National Geographic Kids: Frogs! and Froggy Rides a Bike (or another Froggy book.) After reading aloud or sharing the books, talk about the author’s purpose for each book. Lead a discussion that helps students learn that nonfiction books are written to teach us about a topic, while fiction books are written to entertain us with a story.
As an extension you might want to copy or share pages from the following suggested books for a discussion and class sort. For the fiction books, focus on parts of the text such as “once upon a time”, “happily ever after”, the introduction of characters and even the illustrations. For nonfiction focus on pages with specific facts, photographs, diagrams or bold words, the index or glossary.
Some other suggested books to share with students might be:
Diary of a Spider by Doreen Cronin & Spiders by Nic Bishop
Diary of a Worm by Doreen Cronin & Wonderful Worms by Linda Glaser
How Do Dinosaurs Eat Their Food by Jane Yolen & Dinosaurs by Gail Gibbons
Stellaluna by Janell Cannon & Bats by Gail Gibbons
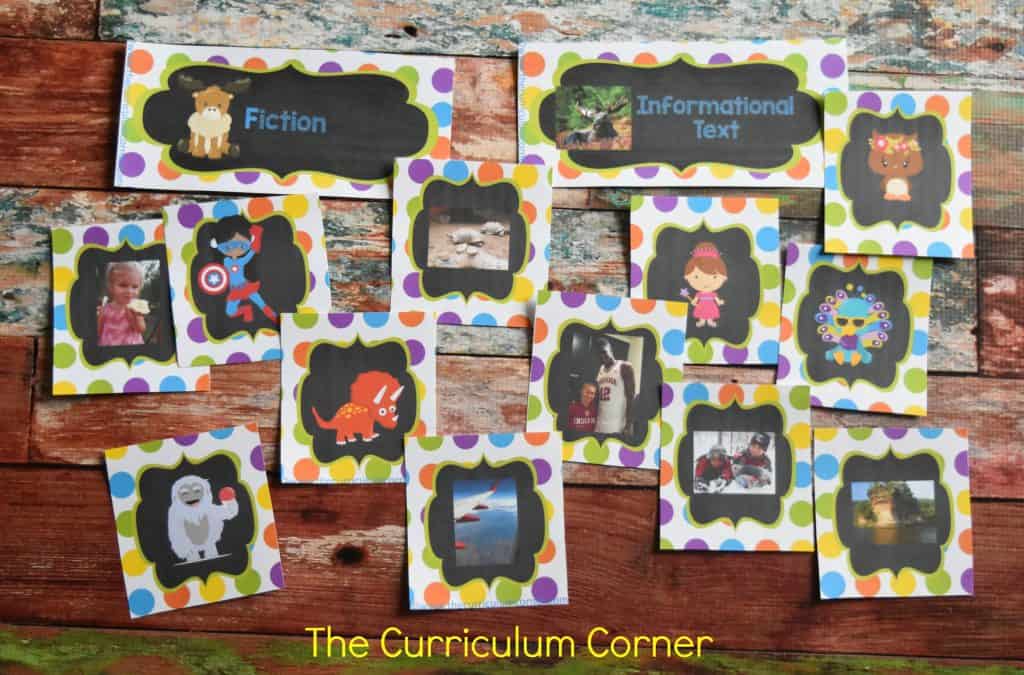
Again, a follow up small group activity or center has been provided. It is a picture sort that has students looking at details of the pictures to determine if they would be found in fiction or nonfiction books. Use one of each of the bookmarks provided as the titles for your sort and have students put the pictures with the correct one.

Choosing a Topic – Model how you would fill out the topic choice page called “I know a lot about these animals…”. (Two options have been provided depending upon how many choices you would like for your students to have.) Think out loud for your students so they see that you have reasons for each of your choices. Be sure to emphasize your experiences or reading about the animals you add to your list so students know they should do the same when making their choices. Tell them they need to think about what they already feel like “experts” on and write the names of those animals. You might even want to send these pages home so parents can help students to determine the choices that would be best for them to write about.
Once students are finished with the pages you will need to determine if each student will write about a different animal or if you will have some students writing about the same animal. The end result of this unit will be pages combined into a class book. You could have more than one page about some animals or choose to create more than one class book if many of the students choose the same types of animals. Determine each student’s topic and share the topics with the class.
Learning Some New Facts – Though students will be using much of their own background knowledge to write their pieces, you may want to also supplement their knowledge a bit. If so, you can obviously take a trip to the library yourself to find appropriate books for them to read and learn more about their specific animals. If some of your students aren’t ready for that level, you could also find short videos for small groups to watch with an adult.
Of course another effective way for students to learn even more about their animals is study trip to the zoo. Though we know this isn’t always possible, if you are able to go you could have specific chaperones act as guides for students learning about the same animals. We have provided five pages for students and/or chaperones to use for observational drawings and note-taking while at the zoo.
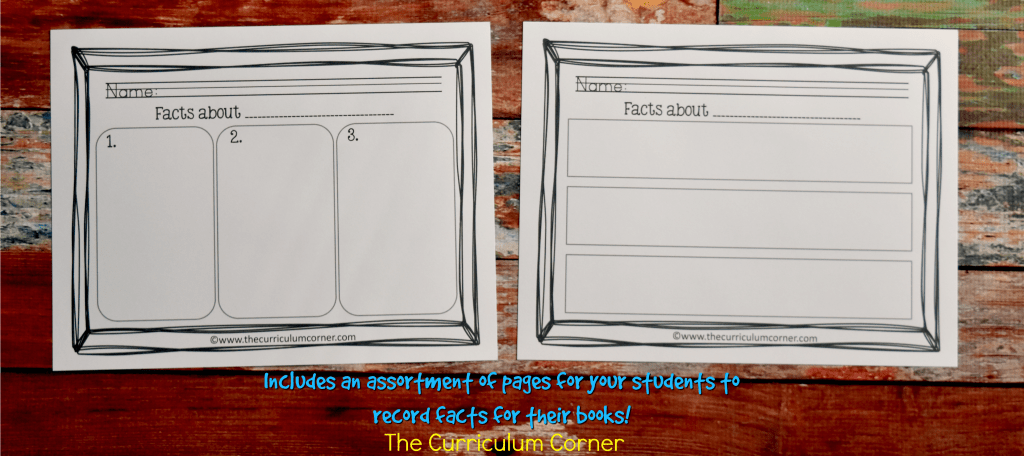
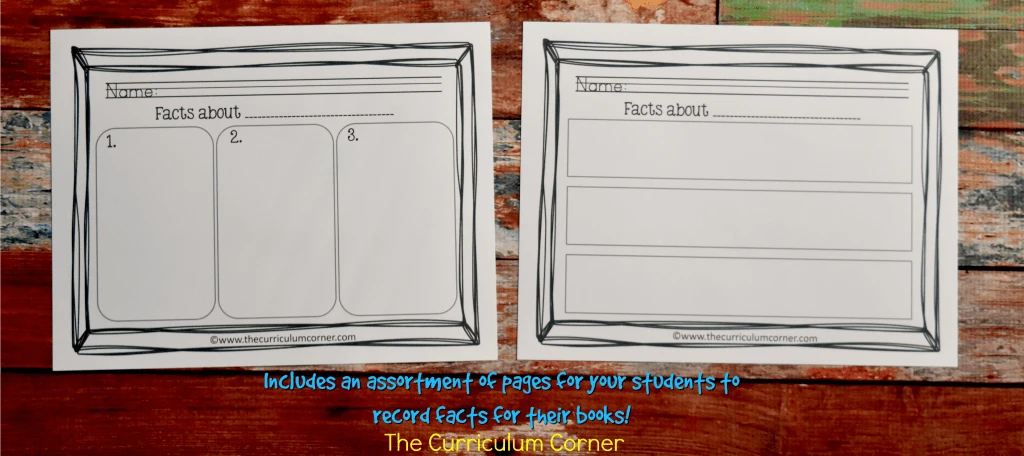
Recording New Facts – If you do choose to do one of the above to help your students gain some new knowledge, you will also want to model how to write some of their new learned facts. Use one of our four “Facts About…..” pages. These will serve as beginning graphic organizers for students as they begin to write their text. Choose one (or more) that fit your learners the best.
Using a Local Expert – You might also want students to learn there are other ways to gather information. If possible, have an “expert” from our local zoo visit your class. To ensure this goes well, make sure your students have very specific questions to ask the expert so that the time is used well. (We all know how little ones are with their questioning sometimes!! LOL!)
Before the visit, use some of your small group or conferencing time to help your students fill out one of the two Question & Answer pages provided. (You might also want to send the expert the list of questions before they visit so they can be sure to have the answers ready!) Once the expert’s visit is completed, have students share their questions and thenew facts they learned.
Important Words – Students may know or learn many words about their animals that are more difficult than they even know how to read. If you would like for them to write these new words (with or without help), we have provided two different personal animal word wall pages where they can record the words and also draw pictures or write definitions. These can serve as a foundation for teaching about nonfiction book glossaries. One suggestion is that you have each child choose a word or two to include in the glossary of your class animal book. You could even have them include the word on their page and go over the letters with black marker to make them bold.
Drawing a Diagram – We know that drawing pictures is the beginning of writing, and that drawing pictures and labeling them with a few words is even the next step. Use this to teach your students how nonfiction authors do the same in their writing. Gather a few books with labeled diagrams and share them with your class. Talk about how diagrams can teach the reader something new, even without all the writing. Model for students how you might draw a diagram of an animal such as a fish, and label a few parts such as the fin, the gill, the eye and the mouth. Have students practice doing the same with their animals on one of the Diagram pages provided. For your struggling writers, this may be the page(s) that they contribute to the class book.
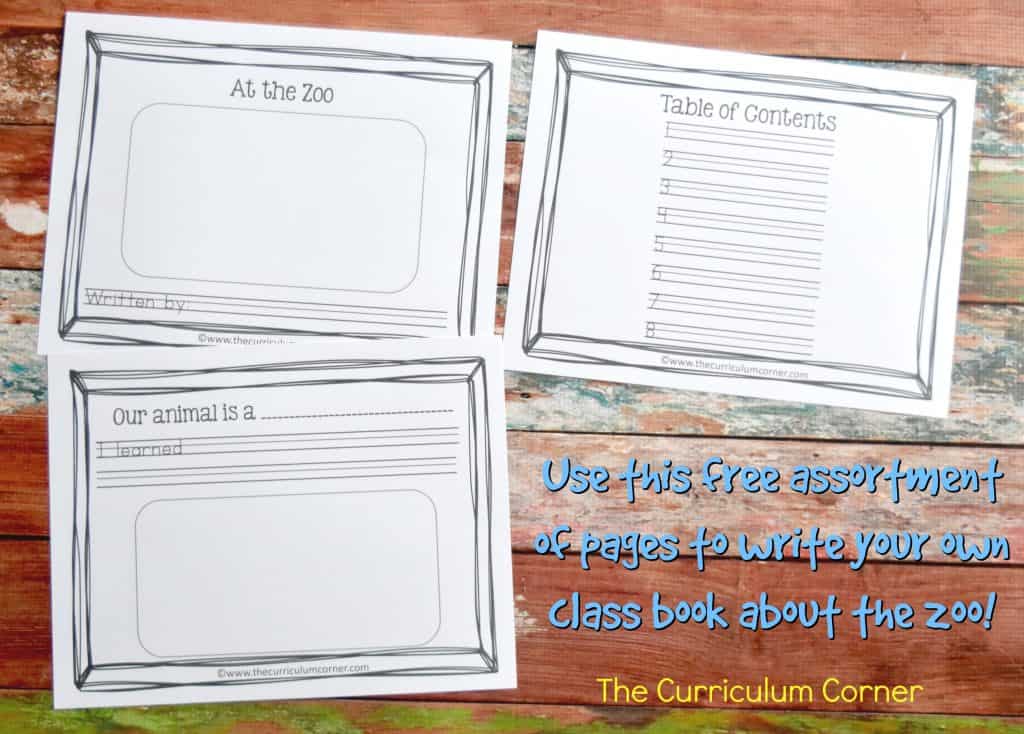
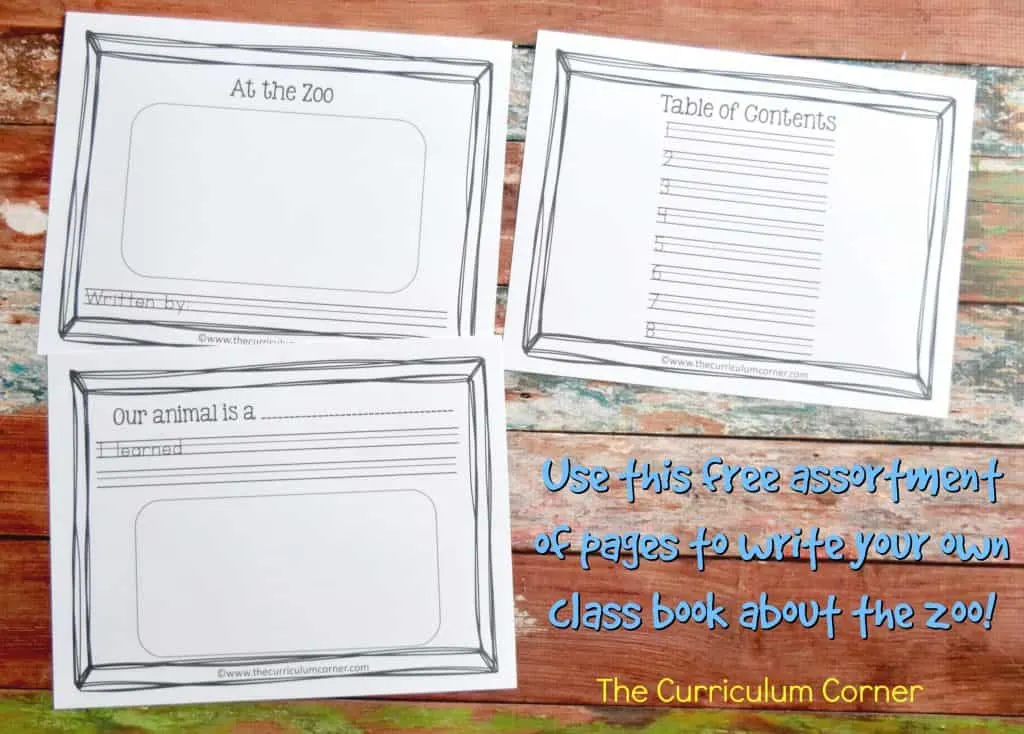
Making a Table of Contents – For a class book about animals, you might want to teach your students about a Table of Contents. Again, gather some nonfiction books that provide examples and share them with your class. We suggest you create the table of contents after all the student writing is done and make this part of the book in a shared writing lesson. Each animal included can be listed with a page number, but if you feel you have too many animals to list them all separately, have a discussion with your students about how you could group the different types of animals and create your table of contents using types of animals instead of each individual one. We have provided three different Table of Contents pages for you to choose from that can serve as the actual pages of your book.
Turning Facts Into Writing – Modeling through mini-lessons and one-on-one conferencing will be very important as students begin writing, so that you can provide the guidance each student needs. If you would like some resources on effective conferencing, you can check out our conference guide which is located in our Editable Writing Management Binder. Obviously you know your students capabilities best and what their needs will be as they write. We have provided some various book pages you can choose from as you think through what you want your class book to look like. You may even decide to divide your class into groups and create several smaller class books depending upon their abilities and strengths. If you don’t see any pages in this download that look like what you need, you might also try our Nonfiction Writing Blank Book Pages.
Continue Writing – As your students continue to write, your mini-lessons will reflect the skills you feel that students are struggling with. You can rely on your conference notes to determine the focus of your direct instruction for the rest of this unit. If there is a specific text feature, concept, language skill or other skill you feel students are not understanding well, you can model it by sharing more examples and writing in front of your class. Depending upon your students’ levels and abilities, they may need several days of writing to complete their pages or books before moving on. Continue with mini-lessons addressing needs until all students have time to complete their writing.
Revision & Editing – Do you have students who are ready for some beginning editing practice? Small guided writing groups (or even one-on-one conferencing) to read and discuss student pages (and talk about ways they can improve them perhaps) are a good way to start teaching students how to edit. We have provided two versions of a simple checklist you can use for editing. As you sit in your group you can refer to the checklist and say things like, “Let’s all check for capital letters. Put your finger on the first letter and check,” or “Let’s all look together to see if the animal name is spelled correctly. Let’s say the letters out loud.” You might even begin to talk about ideas for including more descriptive words and adding details to pictures. Have students partner up and read their pages to each other as well.
Unit of Study Celebration – We like to celebrate all of our units of study with some type of celebration. We believe it is important for students to share what they have been working on with others – just like real authors. This can be a very simple gathering where you invite in families or other staff members from your building to read the class together or aloud. (Or plan to send students to other classrooms to read aloud.) You might want to plan something more elaborate and include snacks and drinks. We have included a page of celebration bookmarks/writer’s bracelets you can print and give to your students as well.
You will find the resources described in the lessons above here: “All About” Books Resources
Planning a Dynamic Writing Workshop - The Curriculum Corner 123
Monday 25th of June 2018
[…] “All About” Books (Informational text for younger authors) […]