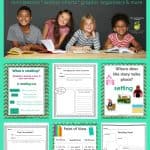
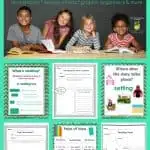
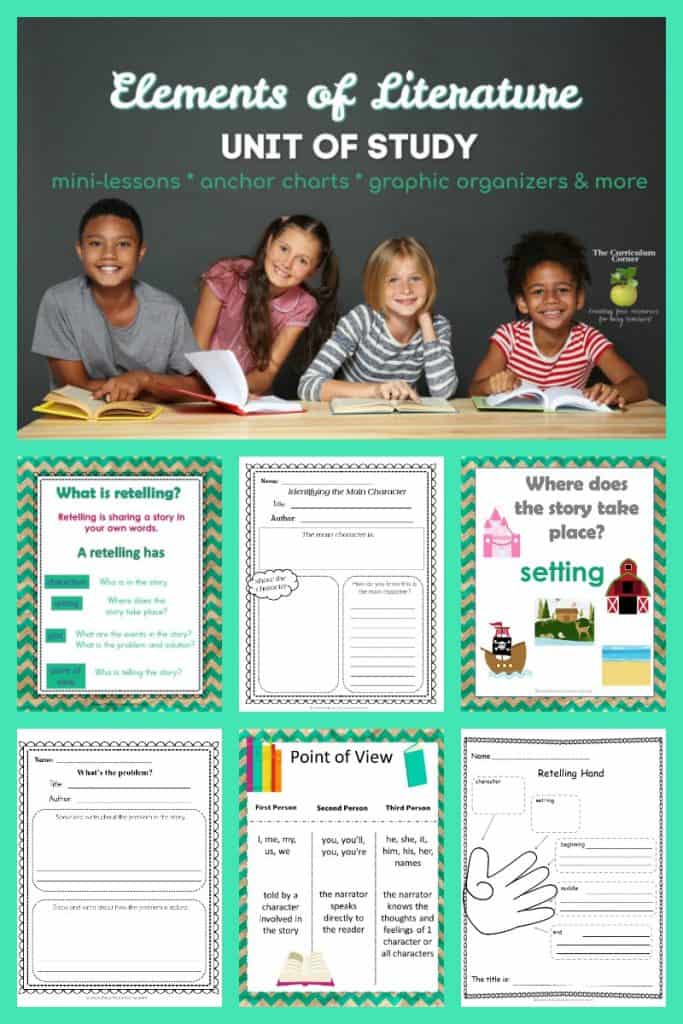
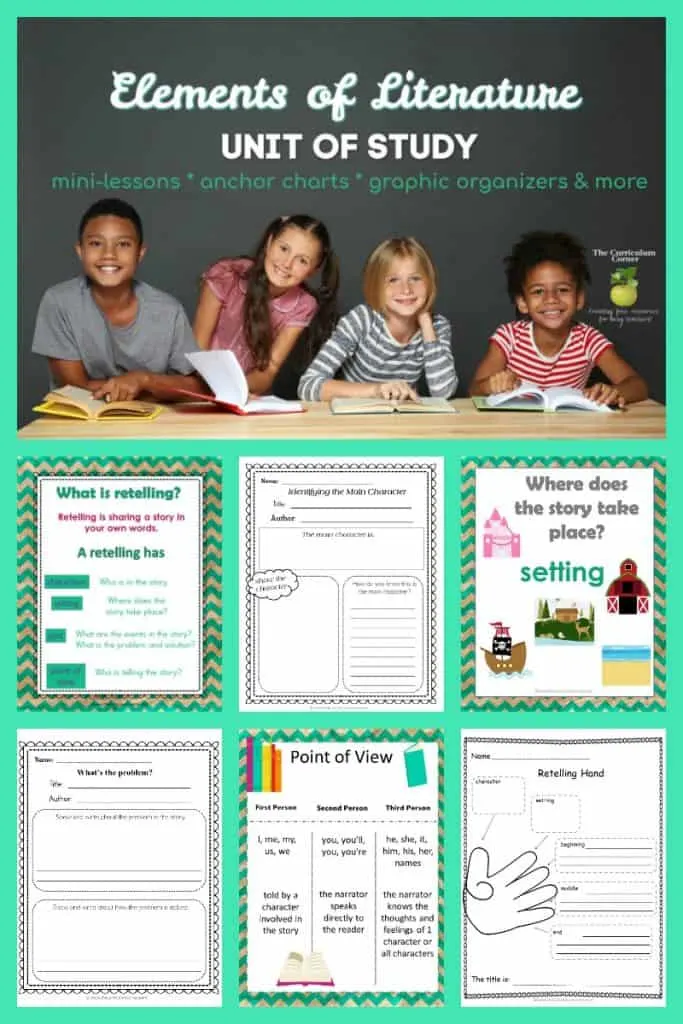
This elements of literature unit of study for reading will help you create a complete unit in your reading workshop.
This is another free resource for teachers from The Curriculum Corner.
This Elements of Literature unit helps students learn how to retell along with helping them identify elements of a story.
We have created this unit of study to help your readers become better at understanding the elements of literature. They will then retell stories through their understanding of the characters, setting, events and plot (problem & solution).
 This unit also contains resources to address point of view and the moral/lesson learned in literature.
Lesson 1: What is a Retell?
Many times when asked to retell a story, students will simply list all of the events word for word. We need them to be able to retell stories in their own words so that we know they are using strategies for understanding. It is only when we ask them to tell us what happened in stories that we can figure out their misunderstandings and teach to their needs.
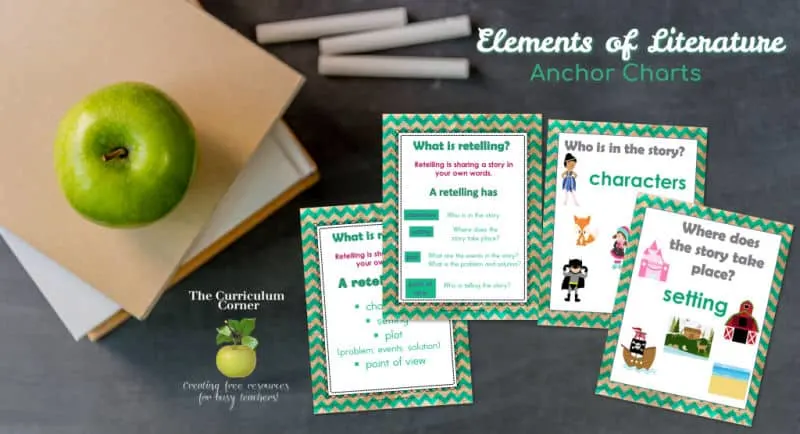
Use our What is Retelling? Anchor Chart to help your students understand what should go into a comprehensive retelling. We need to teach them that there are important parts that should be included in our retells. We have two anchor charts:
- one names the parts that should be included in a retell
- one contains short descriptions of each term.)
We suggest that you display the anchor chart, but cover up the concepts you have not yet introduced so that you can focus on just one thing at a time. For this lesson, you will only focus on the line that says “Retelling is sharing a story in your own words.”
To introduce this lesson, use a wordless book such as Tuesday by David Weisner or Pancakes by Tomie dePaola. Flip through the book a few times showing pictures, then close it and have class contribute to retell the story verbally. Record their retell on chart paper, then open the book to look at the pages again and see if their retell matches the pages. By using a wordless picture book, it will help students to use their own words instead of that of the author.
*As a follow up, use a second wordless picture book and have small groups or partners look at the pictures to create a written retell of their own. You may want to use our 6-box Our Retell of the Story to help them stay organized.
Reading Reminders – These are a series of homework helper slips you can use throughout this unit. They will let parents know what to focus on when reading with their children at home. As you move through the lessons, you can send them home so that students.

Lesson 2: Practice Verbal Retelling using Personal Stories
Many kids love to tell stories about their families or something they have recently done. This is actually great practice for them as they learn to retell stories they’ve read.
Show and model the Tell Your Story graphic organizer using a story of your own. This organizer has a series of three boxes for pictures and a few sentences. You might fill it out out and then model your verbal retell using the organizer as a prompt. Or, you can fill it out in front of the class and then share your retell right after. We want students to focus on not telling every single detail, but the important parts of their stories.
In this initial lesson we will concentrate on a beginning, a middle and an end. This will help them to start ordering events in their own retells. Give students time to think of a personal story and work on the organizer independently. Then, have a few volunteers share these with the class as they retell their personal story in a way similar to the way you modeled.
Lesson 3: Character Identification
This lesson will teach students to identify characters in any story. Many primary students already understand the concept of characters in stories. (In that case this lesson could be used in a small group guided reading setting for those who need further teaching and practice.)
Gather two or three books that have a variety of characters. (The Crayon Box that Talked is one that comes to mind right away for a story that has inanimate objects that are characters.)
Begin by asking students what “characters” in stories are. Share pictures from the books you have chosen and facilitate a discussion about how characters are not always actual people. Next, choose a book to read aloud that has several different characters.
Use our Who are the Characters? organizer to model how to create a list of all the characters in the book. (You may need more than one sheet depending on the number of characters in the story you choose.) As students move to their independent reading you can have them complete this organizer on their own.
You might also want to use our small Name the Character Exit Tickets to perform quick checks for understanding. Students can slip the ticket into their book and hand it in to you for checking later or you can check it quickly during their independent reading.
We have also created a simple Who is in the Story? Anchor Chart that you can also use with students who need additional help.
Lesson 4: What is a Main Character?
For this lesson find a story that has lots of characters, but one with a very obvious main character. One suggestion is the book Chrysanthemum by Kevin Henkes. Read the story aloud to your students and then list all the characters. (You can use the previous lesson’s organizer for this or write them on chart paper.) Then ask your students who they think the story is mostly about. Discuss some of the events that occurred and how Chrysanthemum is the most involved (her actions, her feelings, her words).
Model the Identifying the Main Character Graphic Organizer for students.
Next, have a stack of books ready to show the class that have the names of the main characters in the title, and tell students that many times (but NOT always) the main character’s name will appear in the title.
(Suggestions: David, Pete the Cat, Scaredy Squirrel, Amelia Bedelia, Froggy, Tacky the Penguin, other Kevin Henkes books).
As an extended or second lesson on main character, you can show and read a book such as KnuffleBunny by Mo Willems. This would be an example where the main character is not the title of the story. (If you aren’t familiar with the book, KnuffleBunny is not really the main character. It is the little girl who loses KnuffleBunny.)
Tell them they will need to be careful because it is not always the case that the main character’s name will be on the front cover. Students need to know that they have to read the story to identify the main character This is a good time to also teach the students that sometimes a story can have more than one main character. (Horace and Morris, but Mostly Dolores by James Howe is a fun book to illustrate the concept of more than one main character.)
For this lesson we have also provided a Main Character Exit Slip you can use as a quick check at the end of independent reading.
Lesson 5: What is the Setting of a Story?
We want students to understand that the settings in stories should be naturally included in retells, so we need to make sure they understand what settings are and how to figure them out.
Start the lesson by asking students where some of the stories they are reading take place. Record their answers onto our The Settings in Stories We Are Reading chart and remind (or teach) them of the term “setting”. (You could bring up books you have already read aloud and add those settings to the chart too.)
Next, pick a book to read that has a relatively unique setting.
Some suggestions are Tacky, the Penguin by Helen Lester, Tooth Trouble by Jane Clarke, The Selfish Crocodile by Faustin Charles, Bill and Pete by Tomie dePaola or perhaps a fairy tale where the setting is a castle.
Model our Identifying the Setting Organizer for the students and have them complete it during independent reading.
You might also want to use our Setting Exit Tickets to do a quick check for understanding. Again, we have also provided a simple Where Does the Story Take Place? Anchor Chart for teaching or display purposes.
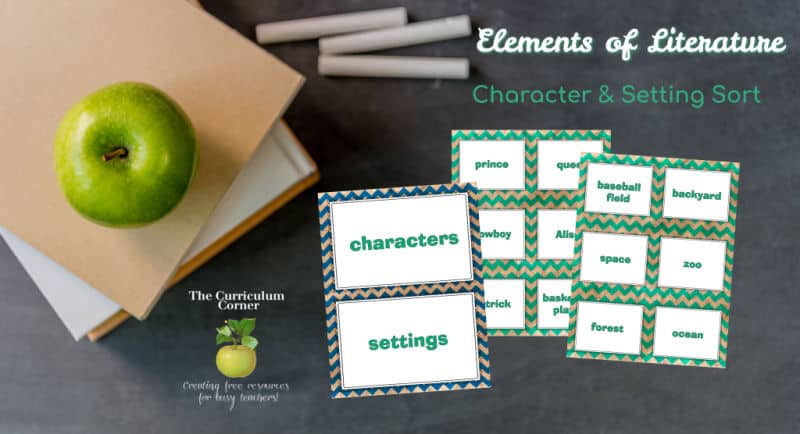
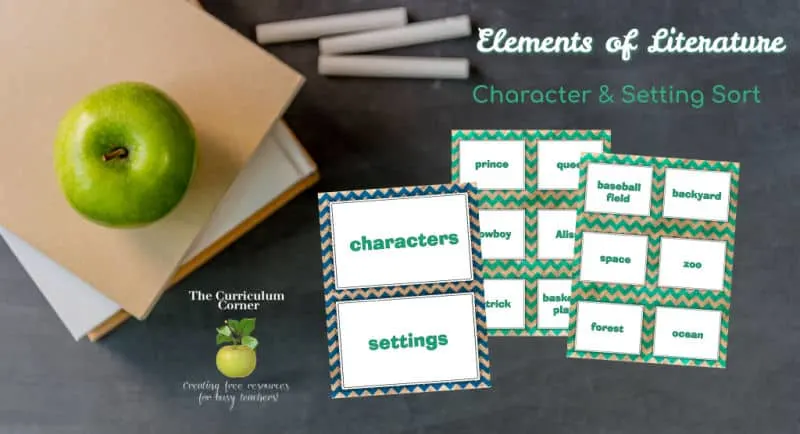
**For added practice, we have created a Character & Setting Sort that you can use for a center or performance assessment. It contains 24 setting or character cards for students to sort into appropriate groups.
Lesson 6: Settings Can Change in a Stories
We also want to teach our students that settings can sometimes change in stories.
For this lesson, think of a book where the setting in the story changes one or two times. Mercer Mayer’s Just Grandma and Me is a suggestion.
Model the Settings Can Change graphic organizer for students after reading the book and discuss how the setting changed within the book. Since settings changing is specific to certain books, assigning this for independent reading won’t work very well.
You may also want to use our half-sheet Settings Change Exit Tickets as a way for students to show understanding in some of the books they are reading.
Lesson 7: The Importance of Settings
To complete your teaching of setting, help your students to understand that settings can play an important role in stories for various reasons.
Choose a story that illustrates the fact that a setting can contribute to the events. (Doreen Cronin’s Duck books might be a choice since the setting is a farm and the stories’ events all revolve around farm animals and their actions.)
Model our Settings Matter organizers (one with a box for main character and one without). This will help students begin to think about how settings in their stories might be central to the events that occur.
Lesson 8: Events in Stories
Discuss what an “event” in a story is – “something that happens in a story”.
Read any story of your choice aloud and then model the Events Graphic Organizer by writing about six events from the book.
You will want to talk about making sure that the events are important. Point out that you aren’t including small details that don’t really matter to the story.
Since pulling out important events from stories can be difficult, we suggest you model this organizer before you have students work independently.
(On one of the additional practice days, you could choose specific stories to give to pairs of students and have them work together to fill out the organizer.)

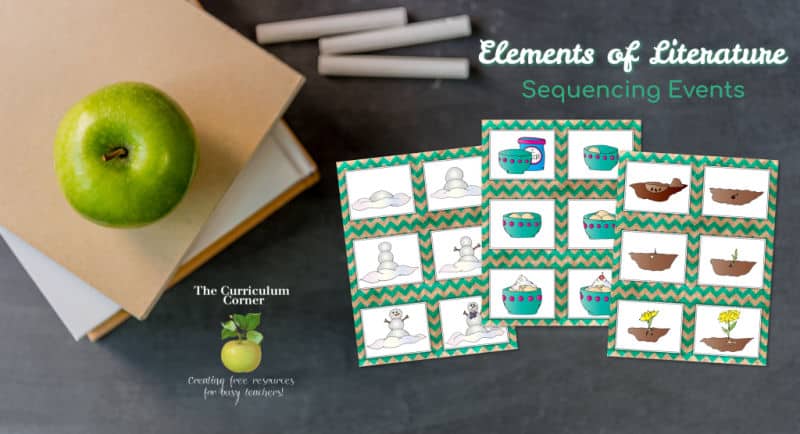
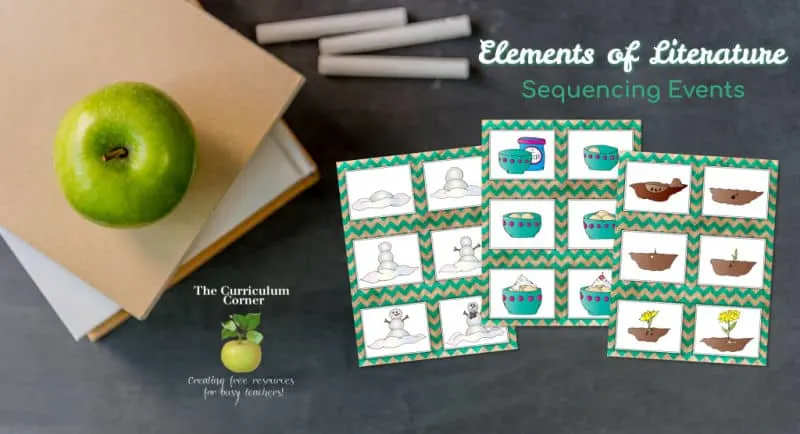
Lesson 9: Sequencing Events
We want our students to understand that a logical sequence is important in retelling.
To help students understand the importance of sequence, pass out the Sequence Picture Cards to small groups. Have them work together to put the pictures in order.
(We have provided three sets of these cards, so depending on the number of groups you want, you may need to copy duplicate sets or you could create some additional sets of your own.)
Once you have talked to all groups briefly, pull the class together and have them share their sequences with everyone. (One idea to make this easier is to add magnetic tape to the back of the cards so that the groups can display them for the class on a board.)
If needed, encourage conversations about why cards need to be in a specific order. (i.e. because some events have to take place before others can – use specific examples from the pictures – you can’t have a flower before you plant a seed).
Let them know that it is the same with stories. Some events can’t happen before others – so it is important to tell the events in order so that the retell makes sense.
Lesson 10: Identify the Problem & Solution
Before we can get students to begin to effectively retell stories, we also need to teach them to identify the problem & solution in fiction stories.
One fun way to begin teaching problem & solution is to show a funny video clip. Follow this with a discussion about what the terms “problem” and “solution” mean.
We found this funny clip about a pig trying to get cookies off the top of a refrigerator: Ormie the Pig Problem & Solution Clip. Take a look to see if it is a good fit for your kids or find another clip on YouTube that you like.
Use our What’s the Problem Graphic Organizer for this activity. Model how to draw and write about the problem & solution in the video. Then, to make sure your students have a firm understanding, repeat the process with a favorite book.
Continue to model how to use the graphic organizer until you feel your class has a solid understanding, then give them the organizer to work on during independent reading.
We have a half-sheet Sharing the Problem Organizer you can use if you need to do this first and then you can move on to the other. We have also provided a Problem & Solution Exit Ticket for a quick check. Use this as a part of this elements of literature study.
Lesson 11: Understanding the Plot
Help students understand the the events will lead up to the problem. Then, more important events will lead to a solution. Again, modeling this as often as possible with stories you read aloud will be key to your students’ understanding.
We have provided three different organizers to help you teach the concept of plot.
We suggest you model each organizer at least twice (for a total of at least six lessons so that your students have adequate modeling).
- The first organizer Events Lead to Problems & Solutions is a simple way for students to start understanding that important events contribute to the plots of stories.
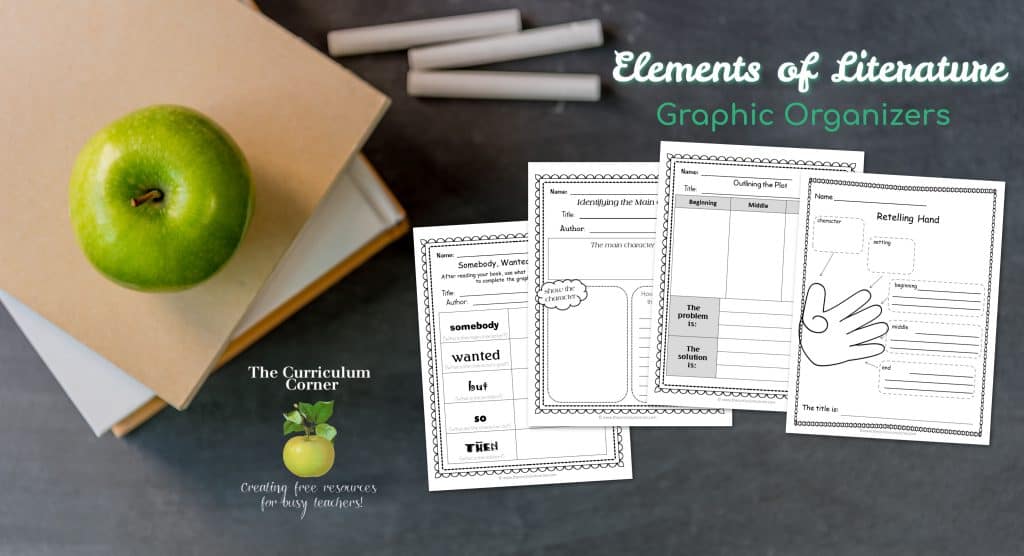
- The second organizer is called Somebody, Wanted, But, So, Then… It will help students to break down a story’s characters, events, problems and solutions in a more streamlined format.
- The third organizer, Outlining the Plot, requires more detail. It has students thinking through the story as a beginning, middle and end (which will include the plot). It also has them specifically telling the problem & solution in their own words.
Lesson 12: Point of View
In addition to teaching your students the elements of a fiction story, you might want to address point of view in stories.
To teach this, we first want them to understand the concepts of “first person”, “second person” and “third person”.
Gather three books that deliver the story from all three of these perspectives and have them ready to share.
Display our Point of View Anchor Chart and discuss the types of pronouns they might see in stories depending upon who is telling the story. Then read each story and have the students guess from which point of view the story is being told.
As you read (or begin) each story, model how to use our half-sheet Identifying Point of View for each story. This requires students to name the person telling the story (character or narrator/author) and the point of view (first, second or third person).
Students may then complete this organizer during independent reading. We have also provided Point of View Exit Tickets as a quick check.
Point of View Center Idea: Have students cut out “characters” from magazines (toys, animals, people) and glue them in the middle of a sheet of paper.
- TOP they need to write a sentence using first person point of view (the character is talking).
- BOTTOM LEFT they need to write a sentence from the second person point of view (a narrator or author is talking to the reader about the character).
- BOTTOM RIGHT they need to write a sentence from the third person point of view (a narrator/author is writing about the character).
**Want more ideas for how to teach Point of View to add to your elements of literature study?
Check out our Point of View Mini-Unit that we created with the help of Jennifer Nealy.
Lesson 13: The Message or Moral of the Story
Many fiction stories also contain some type of moral or message. We want students to be able to identify these messages as they are an essential piece in the deeper comprehension of literature.
Gather your students and display our What is the Message? Anchor Chart. Talk to the students about how many times characters learn lessons in stories and these lessons are the moral or message that the author wants us to learn as well.
Discuss the examples on the anchor chart and ask students if they can think of books, stories or even movies that have these messages at the heart.
Encourage your students to think deeply about the stories they are reading and ask themselves:
- Did the main character learn a lesson in this story?
- Is the author trying to teach me something by telling this story?
For a second lesson on message/moral, read aloud a book that illustrates one of the examples on the anchor chart. Model our half-sheet What’s the Message for students.
Remember to also address the concept of message/moral in most of your future read alouds by having a quick discussion at the end of the story about what the character learned or what the author was attempting to teach.
We have also provided a What Did the Character Learn Exit Ticket for a quick check.
Lesson 14: Retelling a Story
We have found that the best way for students to become better at retelling stories is to have LOTS of modeling followed by lots of practice.
This will simply involve you constantly and consistently modeling the skill in your Reader’s Workshop.
Many teachers are familiar with something called the “Five Finger Retell” which is a way for students to make sure they include all the important parts in their retell.
Other teachers prefer something more simple that involves a beginning, middle and end – in which they incorporate the characters and setting into the beginning portion of the retell and include the plot with the problem & solution into the middle and ending.
We have provided these two types of Retell Graphic Organizers so that you can decide which works best for your class. After modeling them, have your students do them independently with their fiction stories and use them as prompts as they start to retell stories.
We have also provided two resources for group work called Our Retell of the Story that can give your students added practice in identifying the elements that need to go into a good retell. These are meant to be completed with partners or in small groups. Students can fill them out and then practice using them as prompts for retells to the class.
Here is the link for our Elements of Literature Unit Resources:
Literature Elements Resources
You will find a coordinating unit of study on The Kinder Corner designed for younger learners.
Retelling Unit of Study for Kindergarten
Julie Severns
Wednesday 21st of October 2015
Very useful for classroom.
Teacher1
Monday 19th of October 2015
Thanks so much for these they are well done and useful.
Lynda Courage
Thursday 15th of October 2015
I am sharing this site with all of my colleagues at school. Thank you so much for all of your information and for sharing it with us for FREE! I personally appreciate your help with my classroom.