
This tutorial will help you with making a PDF fillable in Google Classroom.

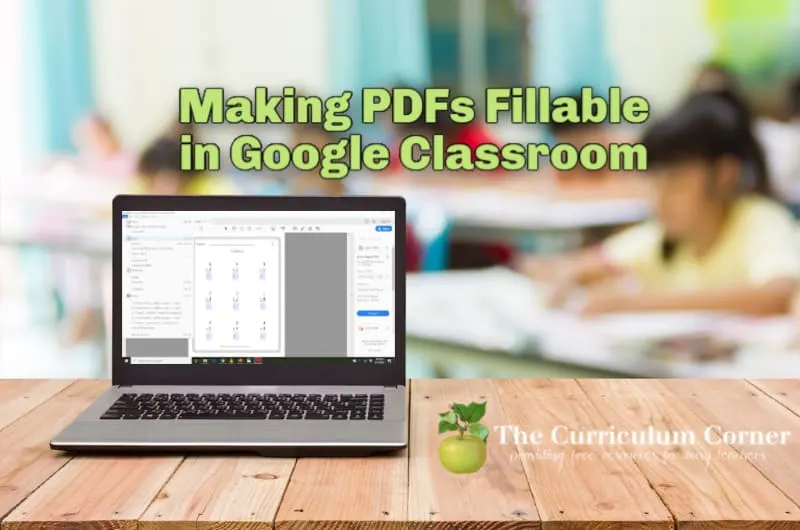
This is another free tutorial for teachers and parents from The Curriculum Corner.
Working on making PDFs fillable in Google Classroom? We hope we can help!
After our previous two tutorials on working with PDFs, we’ve received many questions on working on Google Classroom.
Google Classroom is new to us and we have just started to play around and learn how it works.
We wanted to get this tutorial out to teachers as quickly as possible with an approach that works. Please feel free to share with us if you have found a better solution. We are not claiming that this is the best solution – just the one that we found that we could make work with free resources.
One thing we don’t like about this series of steps is that there are many steps and it could be time consuming. Again, we welcome any suggestions that would make this easier for teachers!
You will find three tutorials below:
- How to make a page in a PDF a PNG file.
- How to make a document fillable in Google Slides
- How to assign tasks in Google Classroom
For now, here are the steps we have found:
(We will make updates as we receive feedback.)
First, you will need to turn your PDF into a png or image file.
If you have a program that will save a PDF to a JPEG, feel free to use this program instead. It will be faster!
- Open the PDF you will be using in Adobe Reader.
- Make the page fit to the screen. Click on the box at the top that says 100%. On the drop down, select Zoom to Page Level. You should now see the entire page displayed.
- Press on your Print Screen button on your keyboard. This will take a picture of the screen for you.
- Go into your screenshot folder. (If you aren’t sure where this is, on your “Type here to search” bar simply type screenshot. Your most recent screenshot should show up in the photo section. Double click on the image to enlarge it and open your photo editor.
- Your screenshot will show the entire screen. You need to crop this image so that you only have the worksheet.
- Click on Edit & Create. Select Edit.
- Drag the frame around just the worksheet.
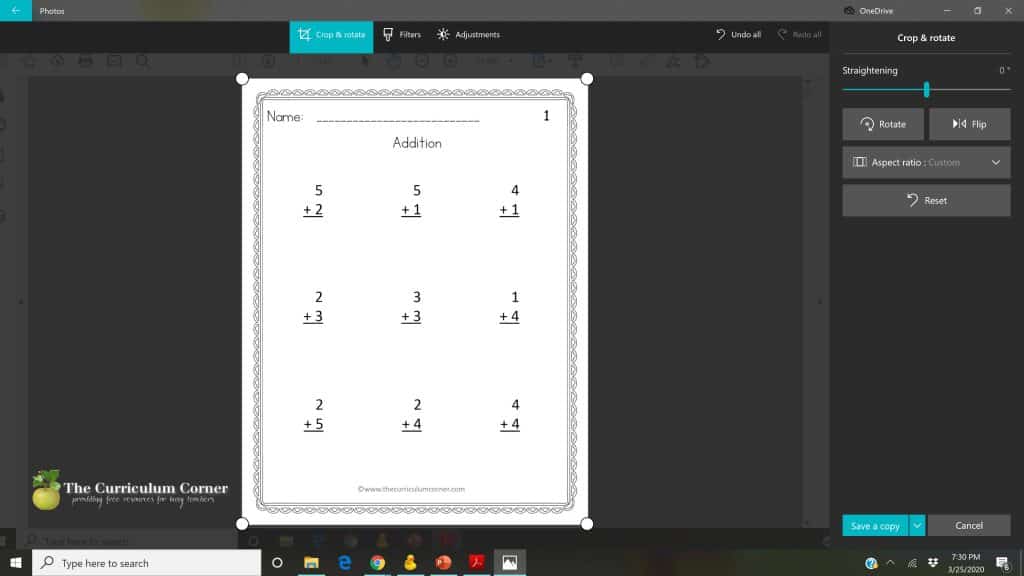

- Click on Save a Copy. You will then be able to title the image as you save it as a png file.
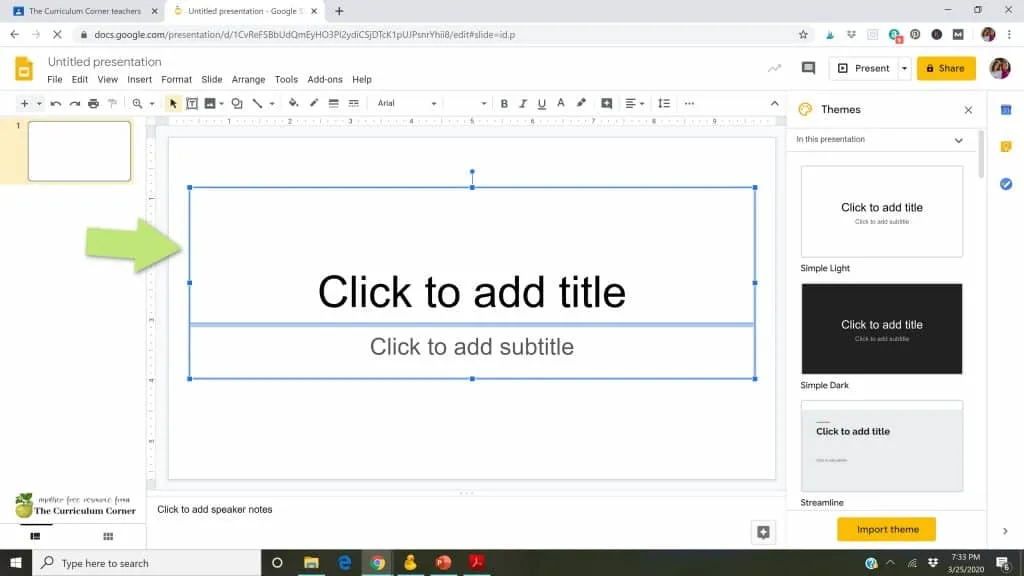
Now, you will make the file fillable using Google Slides.
- Open Google Slides.
- Create a New Document.
- Select the 2 text boxes and click delete.
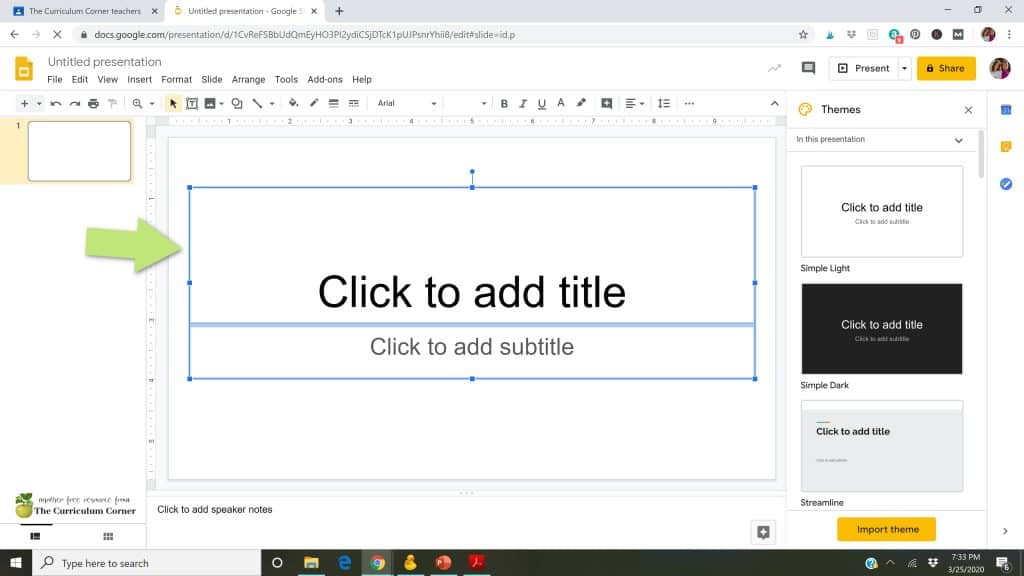
- Under the file drop down, select Page setup.
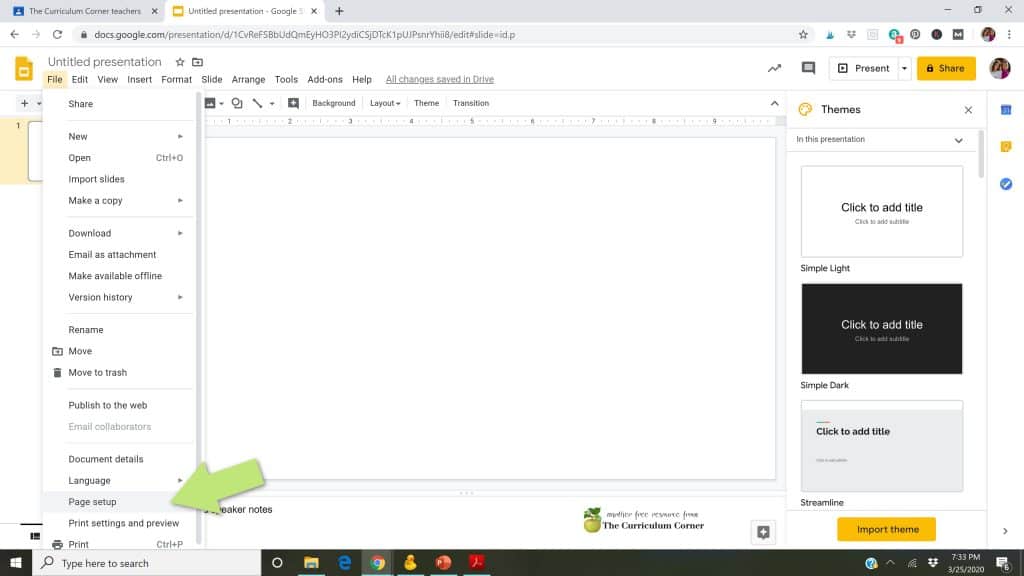
- Click on the drop down where it says Widescreen. Select custom. Type 8 1/2 x 11 and click Apply.
- Under the Slide drop down select Change background.
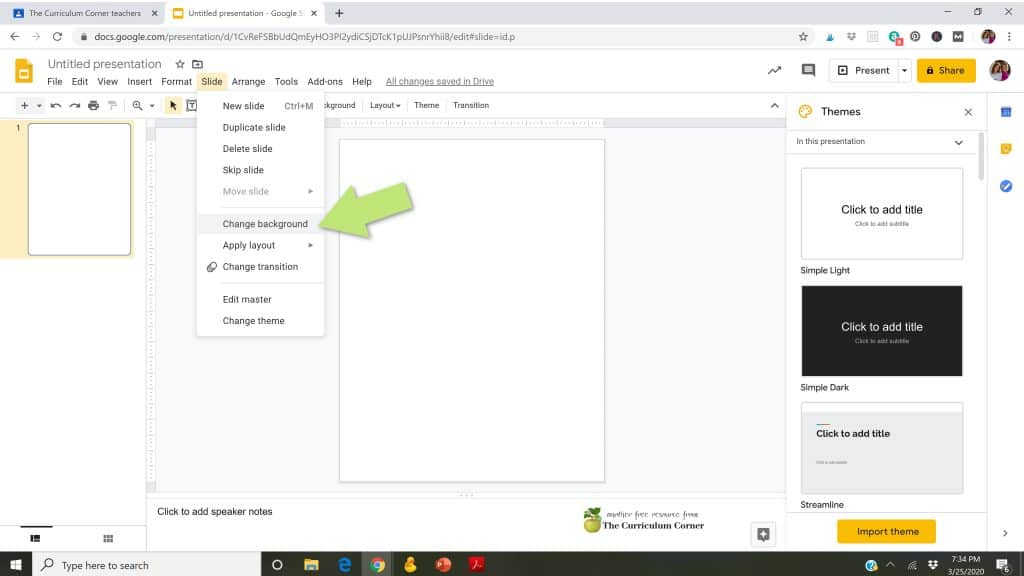
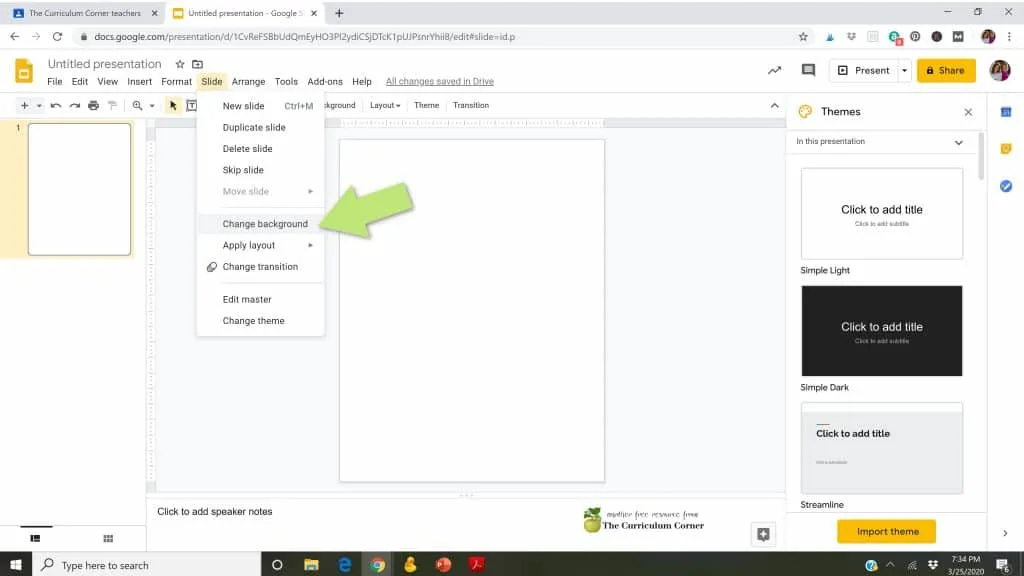
- Select Choose image.
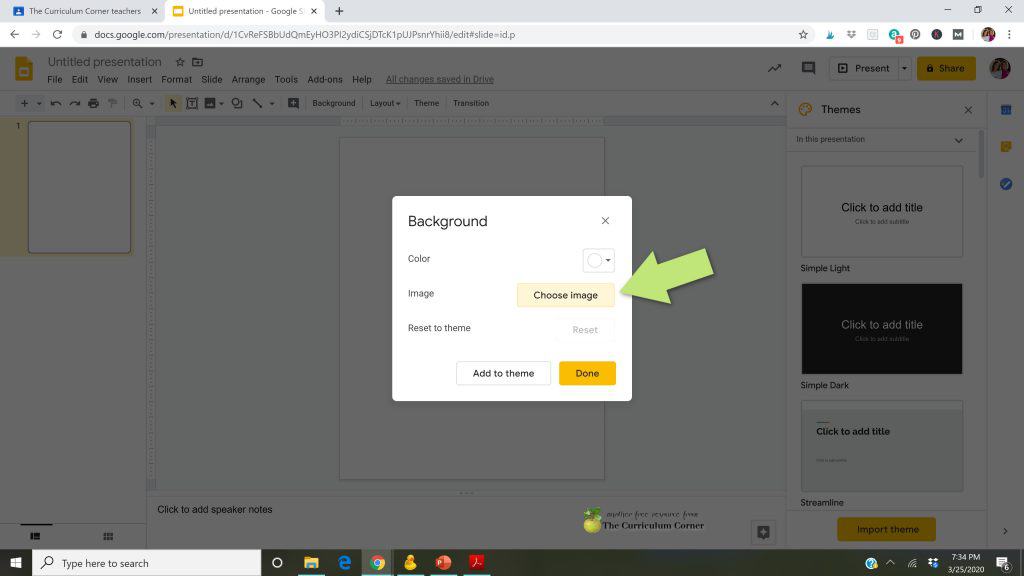

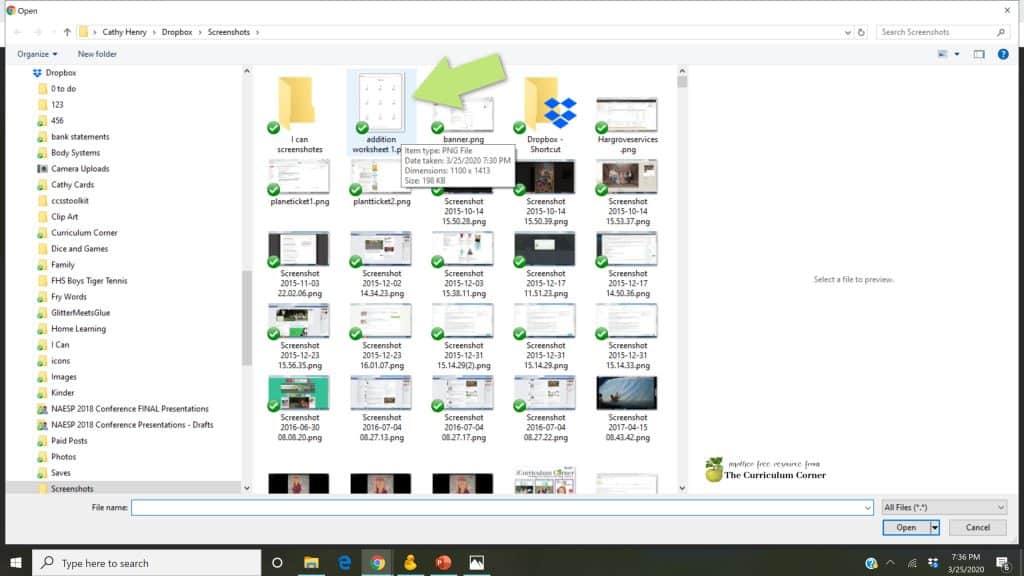
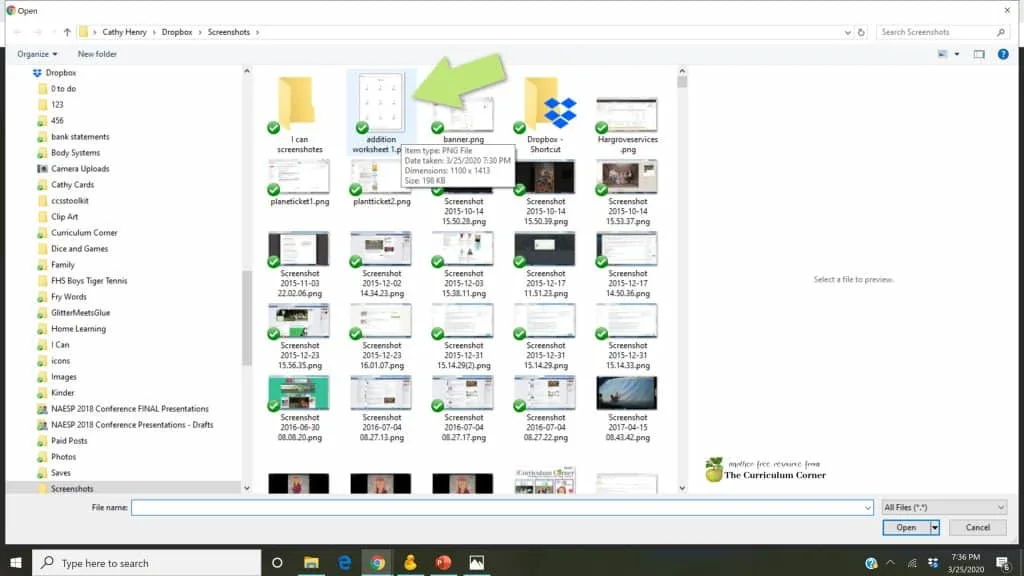
- Under Upload select Browse. Find the screenshot you saved earlier and select.
- Under the Insert drop down select Text box.
- Add text boxes to each spot where you want children to be able to type an answer.
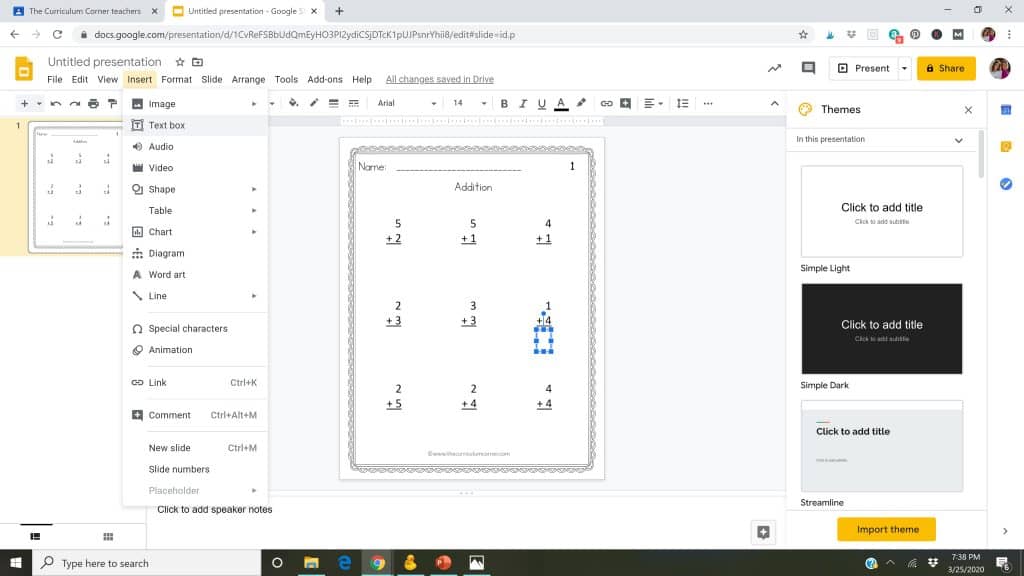

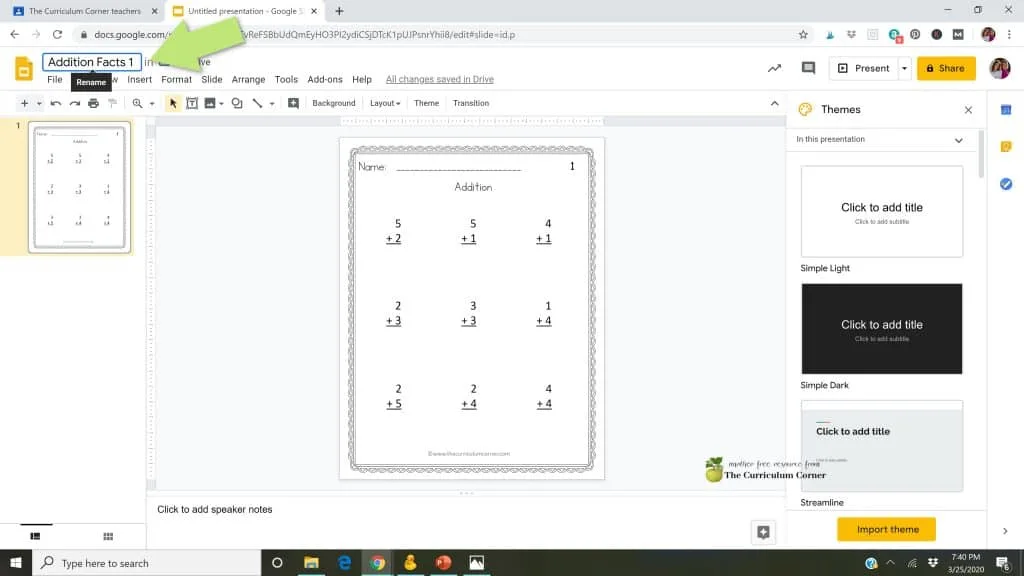
- Where it says Untitled Presentation, click and type your worksheet title.

New Steps!
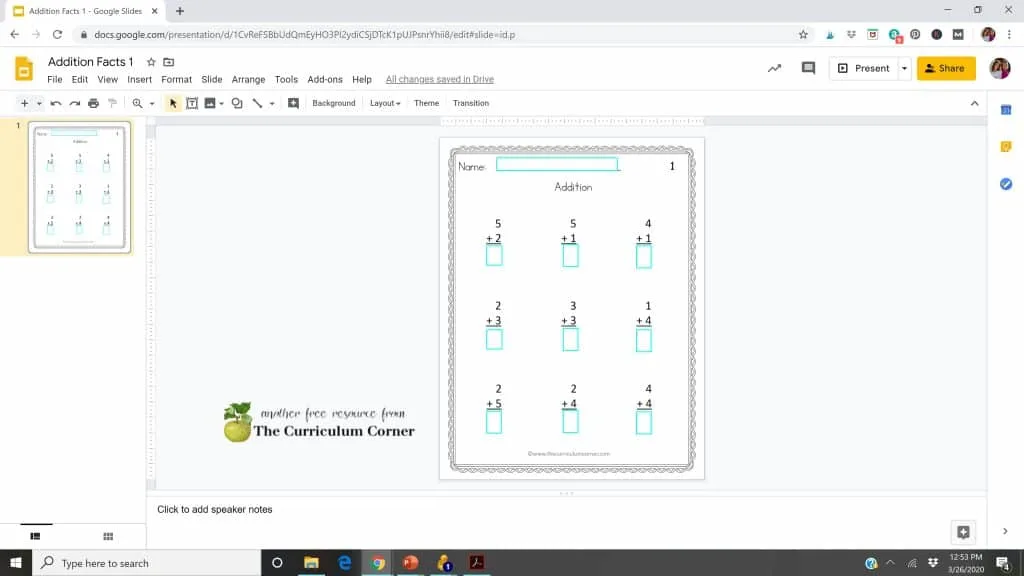
Thanks to feedback from many teachers, we have a new tip to make this tutorial a little better. Below are the directions to outline the text boxes you inserted. By doing this, it will be easier for students to know where answers need to be entered.
- Select all of your text boxes. Hold down the shift button while clicking to select each box.
- Click on the pencil that will say Border color when highlighted. Choose a bold color to make your boxes stand out.

- Click on the icon with the lines to the right of the pencil. It will say Border weight when highlighted. I chose 3px for the weight but choose what works for you.

Finally, you are ready to share the assignment with your students via your Google Classroom.
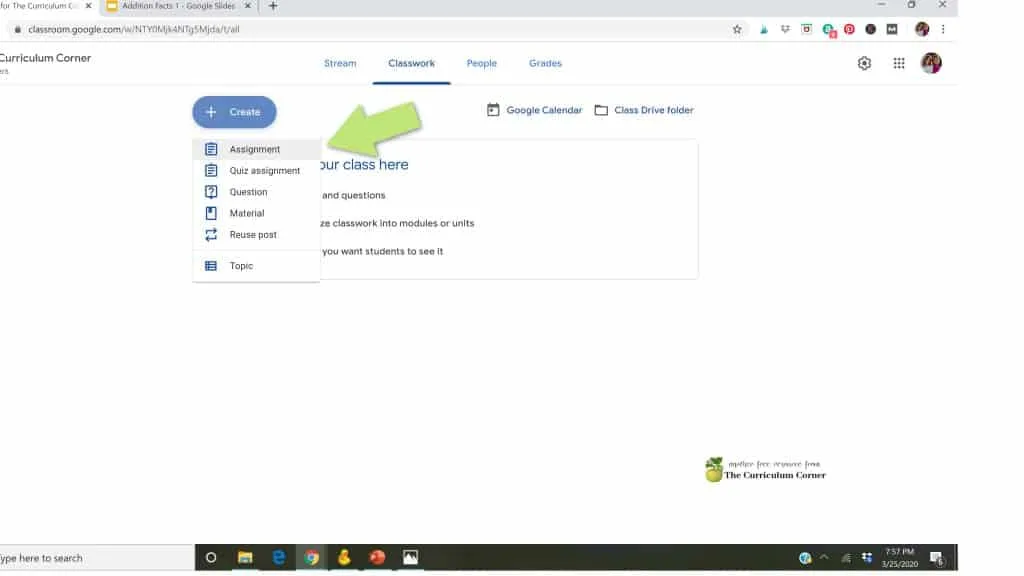
- Once you have opened your Google Classroom, select Classwork at the top.
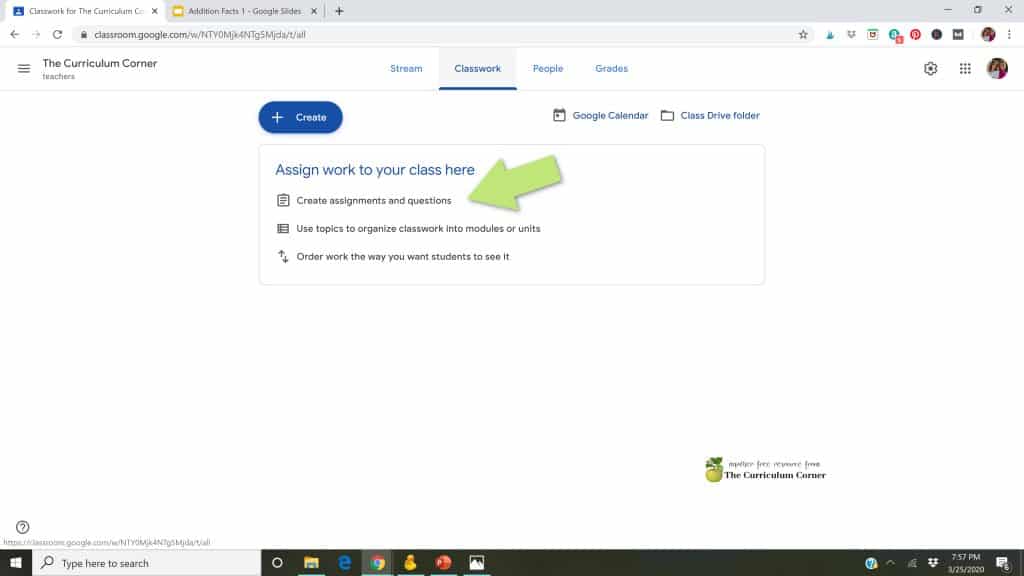
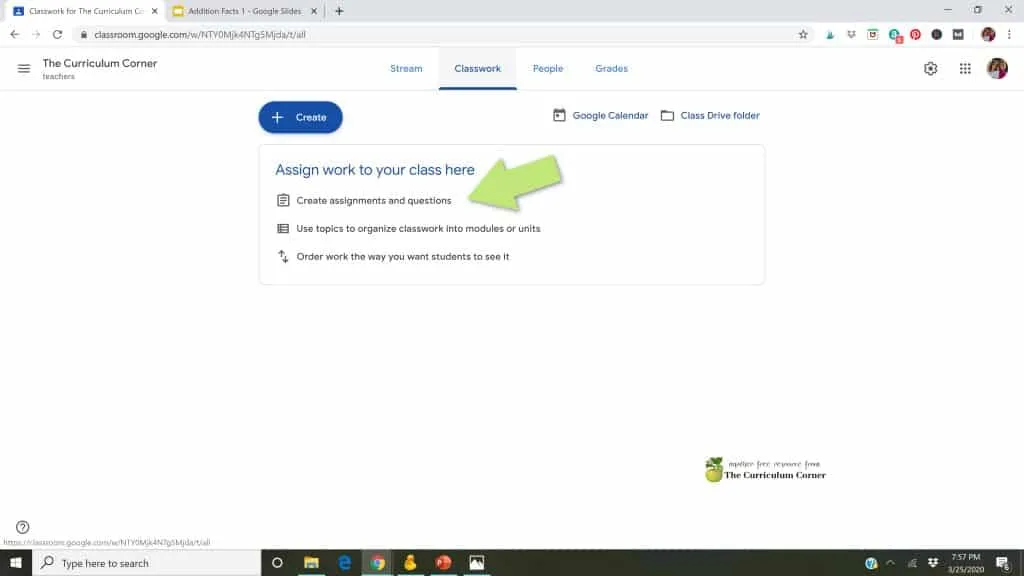
- Click the + Create button that is blue. Select Assignment.

- You can add a title and directions for your students.
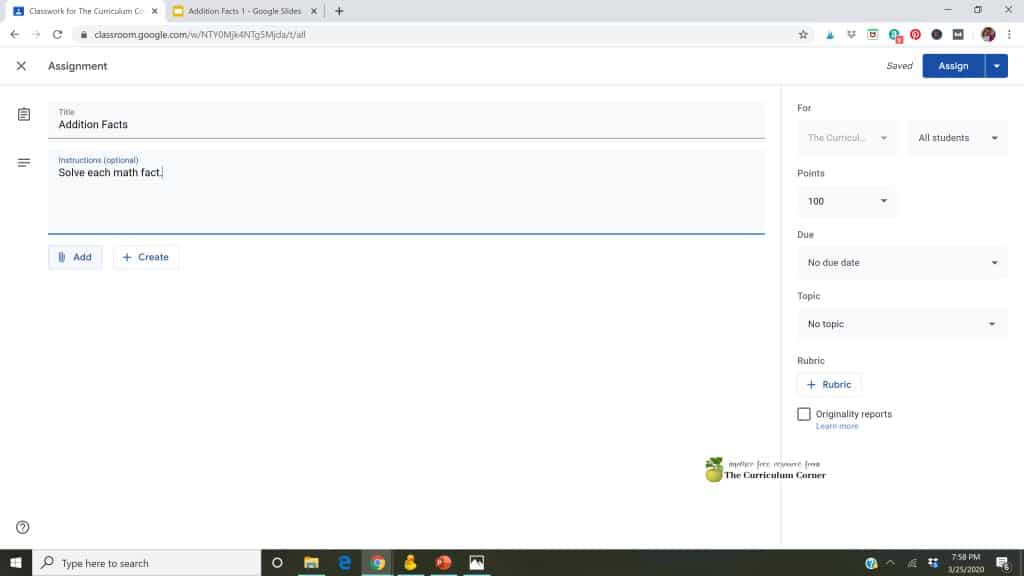
- Then, click on the paperclip.
- You will be able to add the file you created in Google Slides. Select Google Drive. The file you just edited in Google Slides should appear under your recent files. Click on the document and select Add.
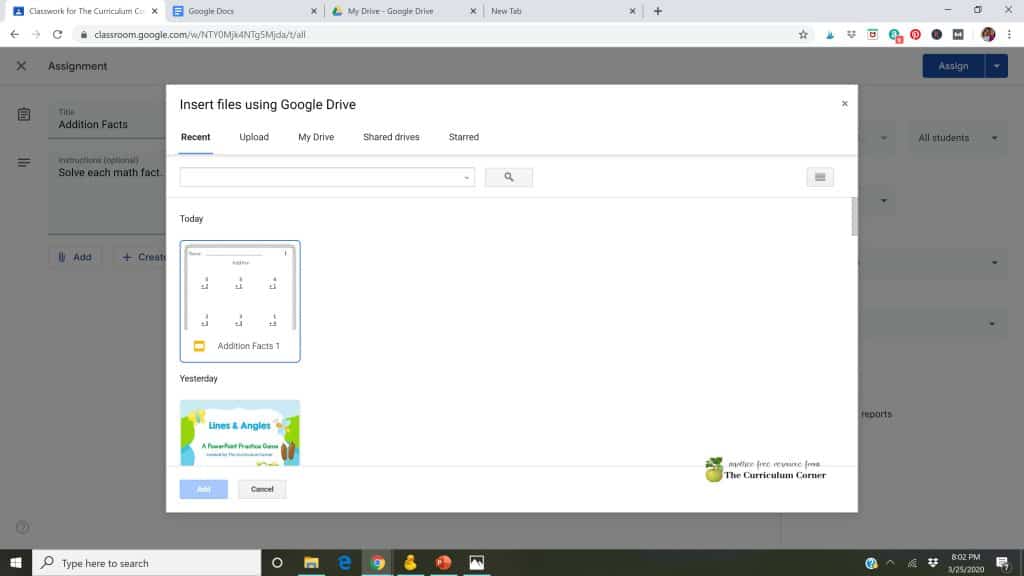
- At first the drop down on the right will say Students can view file. Be sure to change this to Make a copy for each student. Each student will then have their own copy to answer and submit.
- You have shared your assignment with your class and are now ready for your students to complete their work!
Download the printable directions here: PDF Directions.
Other tutorials:
Please keep the questions coming! We can’t promise to know all of the answers but we will research to see if we can find an easy and free way to accomplish what you need to.
Looking for our collection of worksheets, journal pages and other resources that are perfect for creating at home packets? They are all completely free!
Here they are:
Christy
Monday 13th of April 2020
I just did this this morning- if you are on a PC and you have the PDF open, you can pull up something called the 'Snipping Tool'- just search for it on the computer and it will pop up. Once it is open you can make a 'New' snip of anything showing on your screen... this allows for a more zoomed in, already cropped version of what you are looking for AND you can just copy and paste directly into your Google Slide. The snipping tool stays open and you can use it repeatedly by clicking 'New' each time you want another snip. It was quick and easy without having to save the snips anywhere- just pasting them directly into the slide :)
Jill & Cathy
Monday 13th of April 2020
Thanks so much for this tip, Christy! This seems quicker.
Kristi Jacoby
Friday 10th of April 2020
You are the best!! I live in Ca. and our district has been great and has provided all of the e-learning so far. Next week the teachings are on their own using Google Classroom. I'm a 2nd grade teacher and I am not "techy" at all. Thank you for your help with making a PDF an editable slide.
Rachel Tate
Thursday 2nd of April 2020
Hi there! How do the students "submit" the assignment? In other words, how to I see what the completed?
Jill & Cathy
Thursday 2nd of April 2020
Hi, Rachel! Students should have a button on the bottom right of their screen that says Turn in. Please let us know if you have other questions.
How to Make a PowerPoint Game - The Curriculum Corner 123
Saturday 28th of March 2020
[…] Making a PDF Fillable in Google Slides […]