
Wondering how to make a PowerPoint game for your students? Try this free tutorial.

This is another free tutorial for teachers from The Curriculum Corner.
Follow this tutorial on how to make a PowerPoint game to learn a quick way to make your own games.
Our PowerPoint games were originally created with the thought that they are perfect for students to play on your SmartBoard. We’ve expanded our collection to include a range of math and language arts skills.
Still, we know that you will have other skills you would like to allow your students to practice. We love requests but if you need a game more quickly, you might try making your own.
Making your own PowerPoint games is not too challenging of a task. With this tutorial you will be able to create your own games!
Before we get started, we want to share some backgrounds for you to use. You can use your own from the backgrounds supplied by Microsoft in PowerPoint or use your own background papers.
If you would like some easy options as you are getting started, we put together a small collection that contains a background and a frame.
You can download these backgrounds here:
Download and save these files to your computer.
Now that you have a set of backgrounds, you are ready to begin creating.
How to Make PowerPoint Games
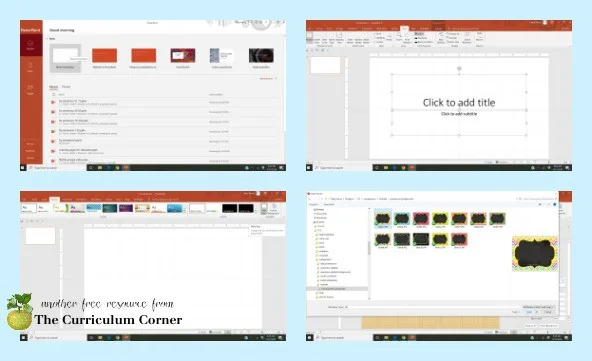
- Open PowerPoint and select Blank Presentation
- Select the two text boxes on the screen. Click delete.
- Under the Design tab, select Slide Size, then Custom Slide Size. Enter width of 11 and height of 8.5. (This size will fit the premade backgrounds we are providing – if you are not using our backgrounds, choose the size that works best for you.) Click Ensure Fit when given the option.
- Under the Design tab, select Format Background. Select Picture or texture fill. Under Picture source choose Insert…
- From the Insert Pictures window, select From a file. Go to where you saved your backgrounds. Select the background you would like to use and select Insert.

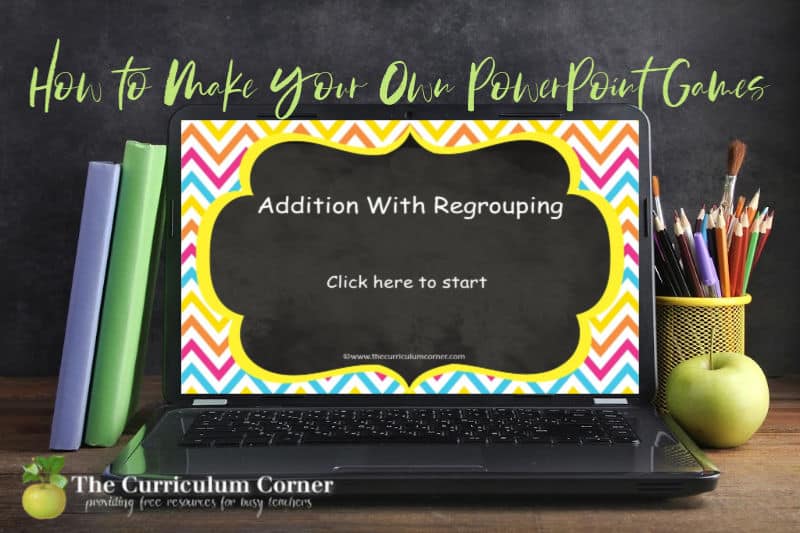
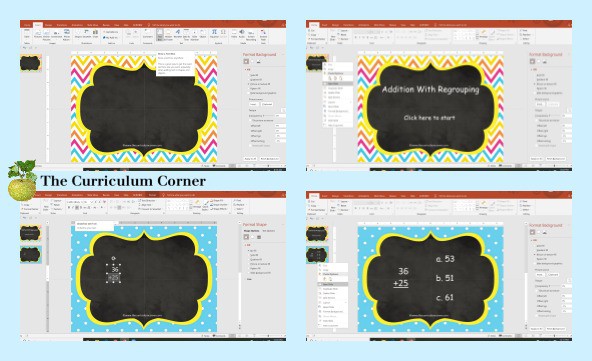
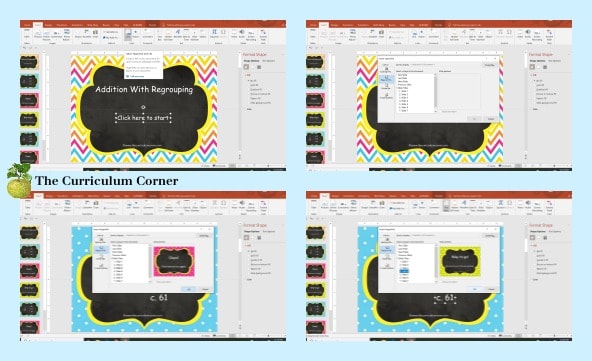
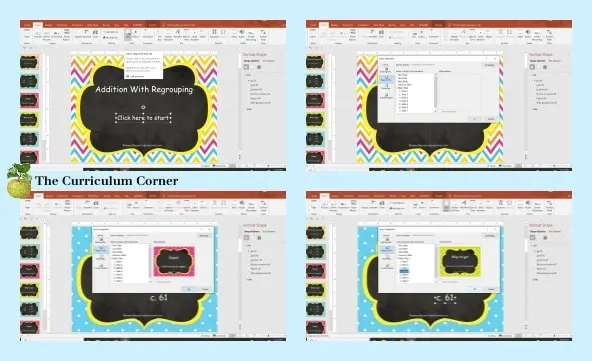
- Add your text on the first slide! This is where you will add your title. Under the Insert tab, select Text Box. Click and drag to place your box on the slide. You will want to change the font, font color and font size to your liking. We then add a second text box that says “Click here to start.”

- On the slide display on the left, right click on the slide you created. Select New Slide. This will give you a blank white slide. You will follow steps 4, 5 and 6 to add the background and wording you would like on your new slide. On this slide, we enter the first problem. We also share two or three options for students to choose from. Each option you give students should be its own text box – this is important for linking the slide later on. In our example we gave an addition problem. We then had choices a., b. and c. for answer options.

- On the slide display on the left, right click on the slide you just created. Select New Slide. Add a background to your new slide. On this slide we are creating an Oops! slide or other wording to signal the student chose the wrong answer. In a new text box below the Oops! message, we enter the words, “Click here to go back to the problem.”
- Repeat step 8. On this new slide you will create a praise slide to recognize students selecting the correct answer. In a new text box below the correct answer message, we enter the words, “Click here to go to the next problem.”
- Continue adding problem slides, oops slide and correct answer slides. On the final slide, we enter the message, “Click here to go back to the beginning.”
- When you are finished with the slides you would like to include, you are ready to link your slides.
- Start on slide 1 – select the text box that says, “Click here to start.” (***You want to select the whole box, you do not want to place your cursor inside the box. If you see the cursor blinking on your text, click outside of the box and then on the edge of the text box to select the whole box. This is important for correctly linking the box.) Click on the Insert tab at the top. Click on the Links drop down. Under Link to: choose Place in This Document. Click on Slide 2 and then OK. You have now linked Slide 1 to Slide 2!

- On the left slide display, click on Slide 2. You will now link the text boxes on this slide. Select the text box for choice a. Click on the Insert tab at the top. Click on the Links drop down. Under Link to: choose Place in This Document. Click on Slide 3 and then OK. Repeat this for choice b. For choice c., you will link to Slide 4 because choice c. is the correct answer. (These are the directions for our Slide 2, if you are using a different problem, make sure you link the correct answer to Slide 4 and the incorrect answers to Slide 3.

- On the left slide display, click on Slide 3. You will now link your Oops! slide back to Slide 2. Select the text box that says, “Click here to try again.” click on the Insert tab at the top. Click on the Links drop down. Under Link to: choose Place in This Document. Click on Slide 2 and then OK. You have now linked Slide 3 to go back to Slide 2!
- On the left slide display, click on Slide 4. You will now link your Way to go! slide back to Slide 5. Select the text box that says, “Way to go!” click on the Insert tab at the top. Click on the Links drop down. Under Link to: choose Place in This Document. Click on Slide 5 and then OK. You have now linked Slide 4 to go back to Slide 5!
- You will continue linking all of your slides. On the final slide, we like to insert a link that returns students to slide 1.
- That is it! You have created your first PowerPoint game! Simply save your game and you can use it on your SmartBoard, at your student computers or share with students to use on their tablets.
Start by working with the sample we made if you want a little help:
A few tips for getting started:
- Choose fonts that are common. Fun fonts are great but if you want to make sure others can use them on their computers, you will want to use common Microsoft fonts.
- Do you use Google Classroom and want to share the game you created with your students? You can add your PowerPoint presentation to Google Slides to convert it. It will still function correctly.
- Slides not working correctly? Make sure you followed this tip from the directions above: You want to select the whole box, you do not want to place your cursor inside the box. If you see the cursor blinking on your text, click outside of the box and then on the edge of the text box to select the whole box. This is important for correctly linking the box.
- I’ve made my game but how do I make it play? Click on the View tab and then select Reading View. This will make your game play. To exit this view, click esc on your keyboard.
Download the printable directions here: PDF Directions.
Learn how to convert your PowerPoint Games to Google Slides Games here: Converting for Google Classroom
Other tutorials:
Please keep the questions coming! We can’t promise to know all of the answers but we will research to see if we can find an easy and free way to accomplish what you need to.
Looking for our collection of already made PowerPoint Games? They are all completely free!
Here they are:
Convert a PowerPoint Game to Google Slides - The Curriculum Corner 123
Saturday 28th of March 2020
[…] For our sample, we started with the practice PowerPoint game we made in our last tutorial. You will find this here: How to Make a PowerPoint Game. […]